For first-time board owners
Pamilya Cutting Board (Small)
A 10x10 inch solid acacia board, sized for a single household's daily prep. The right starting point for the care rhythm in this guide, with enough surface to handle weekday cooking.
Where to Start: Boards Aren't Plates
Why Board Care Differs from Plates and Bowls
If you have read our guide to acacia bowls or our guide to acacia plates, much of the foundation will feel familiar. Acacia is the same dense, food-safe hardwood whether it is shaped into a bowl, a plate, or a cutting board. For the full primer on acacia as a material (Janka hardness, food-safety properties, sustainable sourcing), see our complete acacia wood guide. The monthly oiling, the never-rules, the storage principles all carry over.
But cutting boards live a different life on your counter.
A bowl holds food in its interior. A plate carries food on its top surface. A cutting board takes the impact of every knife stroke. Cooked food sits on it for minutes. Raw food sits on it for longer. Knife marks accumulate. Juices pool. The wood meets the most challenging environment in your kitchen, day after day.
That changes the care rhythm. You wash more carefully. You sanitize. You watch the wear pattern for sanitation risk, not just aesthetic damage. And the oiling protects something more than a finish, it protects the wood from absorbing more than it should.
The Two-Board Rule
Cross-contamination is the reason every food-safety authority recommends at least two separate boards for raw and cooked food. The U.S. Centers for Disease Control, the U.S. Food and Drug Administration, and every culinary school teach the same rule.
Board One: raw meat, poultry, fish, and seafood only.
Board Two: vegetables, fruits, bread, cheese, and anything cooked or ready-to-eat.
Why this matters with acacia specifically: acacia is naturally bacteria-resistant. The Wisconsin study (Ak, Cliver, Kaspar, 1994, cited in References) found that hardwood cutting surfaces self-decontaminate within hours, often outperforming plastic. That natural resistance is impressive, but it is not a substitute for using two boards. Bacterial cross-contamination from raw chicken to a salad happens in seconds, faster than any wood can self-decontaminate.
How to keep two boards organized:
- Name them. "Raw" and "Ready" written underneath in pencil. Pencil because it sands off when the board is restored.
- Different sizes. If you have a small and a large Pamilya board, make the small one your raw board (smaller cuts of meat, easier to deep-clean) and the large your prep board.
- Different positions. One on the counter, one in a cupboard. The one you use first is the one you reach for first.
The two-board rule is why the Pamilya Cutting Board Set exists, two boards in one purchase, sized for raw and prep duty respectively.
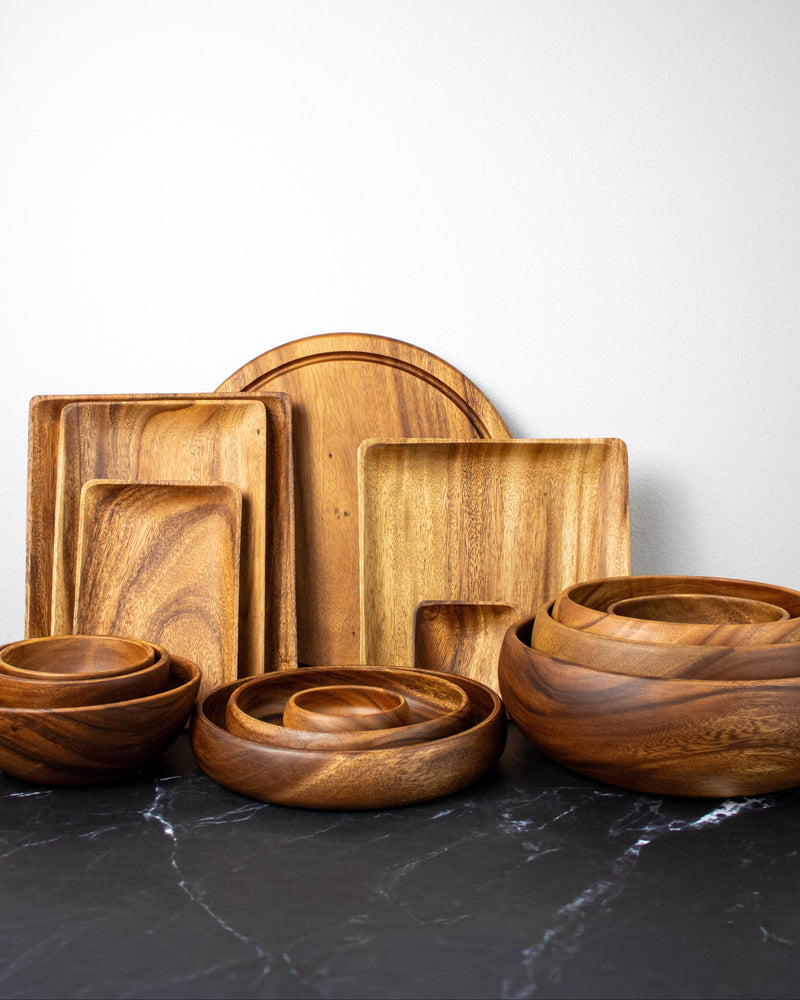
Quick Decision: What Size Board for Your Kitchen
The right board size depends on what you actually cook:
- Small board (10x10 inches). Daily single-person prep, herbs, garlic, onions, fruit, small cuts of meat. Easy to store, easy to wash one-handed. This is most people's first board.
- Large board (14x14 inches). Family cooking, full meal prep, large vegetables, whole fish, hosting. The standard for households cooking for 3 or more.
- D&Co Cutting Board (8x12 inches). A smaller rectangle that doubles as a charcuterie board for serving. Good for households that entertain and want a single multi-purpose piece.
- The set. Small plus large together, which is what most experienced cooks end up at anyway when they realize one board is not enough.
The Basics
Why Acacia Outperforms Plastic on Bacteria
This is the part of cutting board care that surprises most people. Acacia is not just safer than plastic, it is measurably safer.
The 1994 Wisconsin study tested cutting boards inoculated with Salmonella, Listeria, and E. coli. After contamination, hardwood surfaces showed bacterial counts dropping to undetectable levels within 3 minutes, while plastic boards held bacteria for hours. The researchers concluded hardwood cutting surfaces self-decontaminate, likely due to the wood's natural ability to draw bacteria below the surface where they die from dehydration.
Acacia, with a Janka hardness of 1,700 to 2,300 pound-force, is firmly in the hardwood category that the study covered. The dense grain pulls in moisture and bacteria, dehydrates them, and renders them harmless. The same density that resists knife scarring is what makes the wood self-sanitizing.
This does not mean you skip the wash. It means the daily wash plus the wood's natural defense gives you a board that is, by measurable standards, safer than the plastic alternative most kitchens default to.
The Oils That Work for Cutting Boards
The oil rules for cutting boards are tighter than for plates. Boards take more abuse, so the surface protection needs to hold up.
Food-grade mineral oil (USP) is still the standard choice. Odorless, tasteless, FDA-approved for direct food contact under 21 CFR 172.878, and it does not go rancid.
Beeswax and mineral oil blend (1:4) is the upgrade for boards in daily use. The wax adds a water-resistant top layer that survives multiple washes before needing renewal. Most kitchen-supply stores sell this blend, or you can mix your own.
Walnut oil is a natural option but can go rancid over time. Only use on boards you condition every two weeks or less.
Oils to avoid completely:
- Olive, canola, coconut, vegetable oil. They go rancid and the board will smell within months. We have seen boards come back from customers that smell like old fryer oil. The smell does not wash out.
- Linseed oil. Designed for outdoor furniture, becomes sticky on kitchen surfaces.
- Furniture polish. Contains non-food-safe chemicals.
The Five "Never" Rules
The rules are the same as for plates and bowls, with one addition specific to boards:
- Never the dishwasher. Heat and detergent destroy the wood within a few washes.
- Never soak. Water in the grain warps the board permanently. A board sitting in a sink full of dishwater for hours is the most common way boards are killed.
- Never the microwave. Cracks the wood and releases oil.
- Never harsh chemicals. Bleach and antibacterial sprays dry the wood and break down the finish. Acacia does not need bleach because the wood handles bacteria better than plastic does.
- Never leave a wet board flat overnight. The board-specific rule. Water pooled on a horizontal board is the fastest path to warping. Always dry vertically.

The Daily Rhythm
After Every Use: Wash, Rinse, Sanitize
The board has just done its job. Now the 90-second routine:
- Scrape the board clean of solid food bits with a bench scraper or the back of a knife.
- Rinse under warm water to wash off any loose particles.
- Wash with a soft sponge and a small amount of mild dish soap. Pay attention to the knife furrows where food residue collects.
- Rinse thoroughly so no soap residue remains.
- For boards that handled raw meat: follow up with the lemon-and-salt method (next H3) for sanitization.
- Towel-dry with a clean cloth.
- Stand the board vertically on a drying rack or against the wall, never flat.
The routine takes under 90 seconds for a clean prep board, around 2 minutes for a board that handled raw meat.
The Lemon and Salt Method
For sanitizing acacia boards after raw meat, fish, or strong-smelling foods (onion, garlic, fish), the lemon-and-salt method is the gold standard. It is what professional kitchens use, and what every cooking school teaches, because it works without damaging the wood the way bleach would.
The method:
- Sprinkle a generous layer of coarse salt across the board's surface.
- Cut a lemon in half. Squeeze a little juice onto the salt.
- Scrub the salt-and-lemon mixture across the board with the cut side of the lemon. The salt is the abrasive, the lemon's acid lifts pigment and acts as a natural sanitizer.
- Let the mixture sit for 5 to 10 minutes.
- Rinse thoroughly with warm water.
- Towel-dry, then stand vertical to air-dry completely.
The lemon-and-salt method also lifts stains from turmeric, beet, and tomato, so it doubles as a stain treatment.
Why Vertical Drying Matters
This is the single most important habit that separates a board that lasts 5 years from one that lasts 20.
When you dry a board flat on the counter or in a dish rack, water pools on the bottom side. Wood absorbs that pooled water unevenly, swelling the bottom faster than the top. The board warps. Slowly at first, then visibly within months.
Dry vertical, always. Options:
- Dish rack with a vertical slot. Most dish racks have a slot designed for plates that fits a cutting board perfectly.
- Against a backsplash or wall. Lean the board upright with one edge on the counter. Cleanest dry.
- Dedicated cutting board stand. Wire or wooden stands designed for this. A few dollars at any kitchen store.
Whatever you use, the rule is the same. Water must drip off, not pool. Every wash, every time.
Storage Between Uses
Once fully dry (an hour or two later), the board moves to its storage spot. Where you store the board matters as much as how you dry it:
- Vertical storage in a cupboard or stand. Best. Airflow on both faces.
- Hanging from a hook. If the board has a hole or strap, hanging is excellent for airflow.
- Flat on a counter. Acceptable for a board you will use within 24 hours, only if the board is completely dry first.
- Stacked on top of other boards. Avoid. Even with felt, boards are heavier than plates and the bottom one bears the weight badly.
Avoid storage spots near direct heat sources (above the stove, next to the dishwasher vent) or in tightly sealed plastic that traps residual moisture.

Start with one board
D&Co Cutting Board
An 8x12 inch solid acacia rectangle that doubles as a serving board for charcuterie. The lowest-commitment way to start the care rhythm without buying a full set.

The Care Rhythm
Monthly Oiling: Step by Step for Boards
The oiling rhythm is monthly for boards in daily use, more often if the board sees raw meat or heavy prep duty. The mechanics are the same as for plates but with three differences: both faces matter equally, all four edges need attention, and the end grain drinks more oil than face grain.
Step 1: Make sure the board is bone-dry. If you washed it within the last 24 hours, wait. Water in the grain blocks the oil from absorbing.
Step 2: Pour a generous amount of food-grade mineral oil onto a soft cloth. Rub the oil into the working face, following the grain direction. Boards drink more oil than plates because the surface is rougher from knife marks. Apply more than you think you need.
Step 3: Flip the board and oil the back face with the same generosity. The back face is just as exposed to humidity and dryness as the front.
Step 4: Oil all four edges. The end grain (the short edges where the grain is exposed) drinks oil faster than face grain, so apply a second coat directly to those edges.
Step 5: Let the oil absorb for 30 minutes (longer than plates). If the surface still looks dry after, apply another coat to the dry areas.
Step 6: Wipe excess with a clean dry cloth. The board should feel smooth, not greasy.
Step 7 (optional, recommended for daily-use boards): Apply a thin layer of beeswax-and-mineral-oil blend on top. Buff with a clean cloth. This adds a water-resistant top layer that survives multiple washes.
Step 8: Let the board cure for 12 hours before returning to use. Overnight is ideal.
Frequency:
- Monthly for boards in daily prep use.
- Every 2 weeks for boards handling raw meat regularly.
- Every 2 to 3 months for serving-only boards (charcuterie boards used occasionally).
- Always after restoration sanding (covered in chapter 5).
Why Boards Drink More Oil Than Plates
If you have already oiled plates, the first time you oil a board you will be surprised by how much oil disappears into the wood. There are three reasons:
- Surface area. A plate has one functional surface, the eating face. A board has two equal surfaces plus the four edges, all needing the same care.
- Knife marks open the grain. Every cut on a board breaks the wood's surface in a tiny way. Each break exposes new grain that drinks oil.
- Daily moisture cycling. Boards see more water than plates. Each wash slightly opens the grain. Oil keeps the wood balanced between absorption and protection.
The first oiling of a new board takes the most oil. Each subsequent monthly oiling takes less, until you settle into a maintenance rhythm where the board absorbs a consistent amount each month.
When to Wax: The Conditioning Layer
Beeswax conditioning is optional but recommended for any board in heavy use. The wax sits on top of the oil and adds water-resistance the oil alone cannot match.
When to wax:
- After every monthly oiling, if the board sees daily prep.
- After any restoration sanding, to seal the freshly exposed grain.
- Before storing a board for a long period (vacations, seasonal use).
- Anytime water beads on the surface instead of darkening the wood briefly. Beading means the wax is intact and working.
Pre-mixed beeswax conditioners (often called "board butter" or "cutting board cream") are widely available. Or mix your own with 1 part beeswax to 4 parts mineral oil, melted gently and cooled into a paste.
"A cutting board that has been used and cared for becomes a record of the meals it has made. The knife furrows are not damage. They are the wood remembering what your kitchen has cooked."
When Things Go Wrong
Knife Furrows: Character or Sanitation Risk
Every cutting board accumulates knife marks. The question is when they become a problem.
Character marks: shallow scratches that catch your fingernail lightly but do not catch food residue. These are part of the patina. Regular oiling blends them into the wood's character.
Sanitation risk: deep furrows where you can feel food residue stuck after washing, especially after cutting raw meat. The board is no longer self-cleaning the way fresh wood does. Time to restore.
The restoration method:
- Sand the entire working face with 120-grit sandpaper, following the grain. Sand evenly across the whole surface, not just the furrowed area, so the surface stays flat.
- Move to 180-grit for the second pass.
- Finish with 220-grit for a smooth final surface.
- Wipe away all sanding dust with a clean dry cloth.
- Vacuum or shake the board to remove any remaining dust.
- Oil the entire board generously, both faces and all edges (back to the chapter 4 routine).
- Apply a beeswax conditioning layer.
- Let cure 24 hours before returning to use.
A well-cared-for acacia board can be sanded and restored 5 to 10 times over its lifetime before the wood gets too thin. Each restoration extends the board's life by years.
Warping: Rare on Solid Acacia, Fixable When Caught Early
Solid acacia is one of the warping-resistant hardwoods. Its dense grain pattern (irregular, interlocking) resists the linear stresses that warp single-grain woods. But warping can still happen if a board is repeatedly stored wet, left flat to dry, or exposed to extreme humidity swings.
The signs:
- Slight rocking. The board no longer sits flat. One corner lifts when you press on the diagonal.
- Visible curve. Looking down the long edge, the board bows up or down in the middle.
- Cracks at the edges. Warping puts stress on the edge wood, which is the first to crack.
For minor warping, the fix:
- Lay the board on a flat surface with the concave side down.
- Cover the top with a wet (not soaked) towel.
- Place 5 to 10 pounds of weight evenly across the top (heavy books work).
- Let sit 24 to 48 hours.
- Remove weight and towel. Oil generously.
The combination of moisture and pressure encourages the wood to relax back toward flat. Minor warps usually correct within 2 to 3 days.
Stains: Turmeric, Beet, Blood
Strong-pigment foods leave color in the grain. Three common stain sources in any kitchen:
Turmeric. The most stubborn. The lemon-and-salt method (chapter 3) lifts most. For deep turmeric stains, add a baking soda paste step before the lemon-and-salt scrub.
Beet. Bright red but usually fades faster than turmeric. The lemon-and-salt method works well. Light sanding for stubborn cases.
Blood from raw meat. Always sanitize with the lemon-and-salt method after any blood contact. The natural antimicrobial properties of acacia (Wisconsin study) plus the lemon acid handle the bacterial risk. Visible stains usually wash out in the first scrub.
For any stain that resists the lemon-and-salt method, light sanding with 220-grit followed by re-oiling restores the surface.
When to Retire a Board
Acacia boards properly cared for last 10 to 20 years and become heirlooms. But some damage cannot be repaired:
- Cracks that go all the way through the board. Water and bacteria penetrate, the board is no longer safe.
- Splits at the edge. Cannot be sanded smooth.
- Severe warping that does not respond to the flat-towel-weight treatment.
- Board thickness reduced to less than half a centimeter after multiple sanding restorations. The wood is too thin to provide a stable cutting surface.
When a board reaches this stage, retire it gracefully. Acacia is fully biodegradable. A retired board can be sanded smooth and repurposed for serving (a small charcuterie tray), composted (remove any oil residue first), or kept as a memory piece in a kitchen drawer.

When one board isn't enough
Pamilya Cutting Board Set
Two boards, small and large, in solid acacia. The two-board rule made simple, one for raw, one for prep. Packed in a gift box with a free greeting card.
Acacia Cutting Board Care: Frequently Asked Questions
Can I put my acacia cutting board in the dishwasher?
No. Acacia is not dishwasher-safe at any temperature or cycle. Heat and detergent will warp, crack, and damage the wood within a few washes. Always hand wash with warm water and mild dish soap, sanitize with lemon and salt when needed, and dry vertically.
Is acacia wood bacteria-resistant? Is it safer than plastic?
Yes, the research supports this. The 1994 Wisconsin study (Ak, Cliver, Kaspar) found hardwood cutting surfaces self-decontaminate within hours, often outperforming plastic. Acacia is a dense hardwood (Janka 1,700 to 2,300), firmly in the category that research covered. The wood's grain pulls bacteria below the surface where they die from dehydration.
Can I cut raw meat on the same board as vegetables?
No, follow the two-board rule. Use one board for raw meat, poultry, fish, and seafood. Use a second board for vegetables, fruits, and ready-to-eat foods. Cross-contamination from raw to ready food is a food-safety risk regardless of how well you wash between cuts. The Pamilya Cutting Board Set was designed with this rule in mind.
How often should I oil my cutting board?
Monthly for boards in daily use. Every 2 weeks for boards handling raw meat regularly. Every 2 to 3 months for serving-only or charcuterie boards. Always after restoration sanding. Boards drink more oil than plates because both faces and all edges need attention, so do not be alarmed if the first oiling absorbs a lot.
What oil should I use on a cutting board?
Food-grade mineral oil (USP) is the standard. Odorless, tasteless, FDA-approved for direct food contact, does not go rancid. Beeswax-and-mineral-oil blends (1:4 ratio) add water-resistance for daily-use boards. Avoid olive, canola, coconut, or vegetable oil. They go rancid in months and the board will smell.
My board has deep knife marks. Can I sand them out?
Yes. Sand the entire working face with 120-grit, then 180-grit, then 220-grit sandpaper, following the grain. Sand evenly across the whole surface so it stays flat. Wipe clean, then oil generously (both faces and all edges) and apply beeswax conditioning. Let cure 24 hours before returning to use. A well-cared-for acacia board can be restored 5 to 10 times over its lifetime.
How do I sanitize an acacia cutting board?
Use the lemon-and-salt method. Sprinkle coarse salt across the surface, squeeze lemon juice on top, scrub with the cut side of the lemon. Let sit 5 to 10 minutes, rinse, dry vertical. This is the professional kitchen standard, more effective than bleach (which dries the wood and is not necessary on a self-decontaminating surface like hardwood).
Can I leave my cutting board to drip-dry overnight?
Yes, if it is drying vertically. Stand the board upright on a drying rack, against a backsplash, or in a cutting-board stand. Vertical drying lets water drip off completely. Never dry a board flat overnight. Water pools, the wood absorbs unevenly, and the board warps slowly over time.
How long do acacia cutting boards last with proper care?
10 to 20 years and more with the monthly oiling rhythm, vertical drying, and occasional restoration sanding. Many of our customers have boards their parents used, now in their own kitchens. Acacia boards become family pieces when treated with care.
Can I use a cutting board for serving charcuterie?
Yes, this is one of acacia's best uses. The natural beauty of the grain looks beautiful as a backdrop for cheese, meats, and bread. For boards that handled raw meat earlier in the day, deep-clean with the lemon-and-salt method first, then re-oil and let cure before serving. Most experienced hosts keep a dedicated serving board (often the D&Co Cutting Board) that never handles raw food.
References
Sources we cited and consulted when writing this guide. We try to point to the original research where possible.
- Ak NO, Cliver DO, Kaspar CW. "Cutting boards of plastic and wood contaminated experimentally with bacteria." Journal of Food Protection, 1994. The Wisconsin study that found hardwood cutting surfaces self-decontaminate within hours, often outperforming plastic. The foundational research for acacia's antimicrobial advantage on a cutting board.
- USDA Forest Products Laboratory. "Wood Handbook: Wood as an Engineering Material." General Technical Report FPL-GTR-282, 2021. The U.S. Forest Service's standard reference for wood properties, finishing, and care.
- U.S. Food and Drug Administration. "21 CFR §172.878: White Mineral Oil." Code of Federal Regulations. Defines food-grade (USP) mineral oil and confirms its safety for direct food contact.
- Hidayat W et al. "Physical and Chemical Properties of Acacia mangium Lignin." PMC / NCBI, 2022. Background on the structural durability of the acacia species we work with.