Filipino food is delicious and, if we are being honest, hard to photograph. Adobo is brown. Kaldereta is brown. Sinigang leans grey once the tamarind hits. Kare-kare goes orange-brown, and even the greens turn dark once they meet the sauce. Then you set that food on a hardwood table, in a warm-bulb kitchen, next to a bowl of rice, and every color in the frame is competing for the same wavelength of your camera's sensor.
This is not a phone-versus-camera guide. It is a guide about seeing your table the way a photographer sees it, then arranging light, wood, and food so the picture tells the truth about how the meal actually looked. Whether you are shooting for family, for a small business, or for the pure pleasure of remembering a Sunday lunch, the same six things get you most of the way there.
1. Why Filipino food is hard to photograph
Open any Filipino cookbook shot abroad and you will see the same tell. The adobo looks like glossy caramel, the kare-kare like autumn leaves, the sinigang like a pale broth with three neat vegetables floating in it. Beautiful pictures, but not quite our food. Real Filipino cooking is dark, saucy, and mixed. The sabaw is cloudy. The meat has been braising for an hour. The vegetables are folded through, not arranged on top. That truthful version is harder to shoot, and the reason is mostly about tonal range.
The tonal-range problem
Camera sensors, whether in a phone or a full-frame body, struggle when the frame is dominated by a narrow band of midtones. Adobo sauce, sitting in a wooden bowl, on a wooden table, under warm indoor lighting, is one giant midtone. There is no bright white, no true black, nothing for the sensor to anchor its exposure against. The picture looks muddy because there is genuinely nothing in the scene to un-muddy it. Everything you will do in the next five chapters is really about giving the camera a way out of that midtone soup.
The color-cast problem
The second issue is white balance. Filipino kitchens tend to run warm. Incandescent bulbs, warm-white LEDs, wood cabinets, and tiled backsplashes in cream or terracotta all push the light toward the low end of the Kelvin scale. Layer that warmth on top of brown food and brown wood and the picture reads as one big orange smudge. Cool it too far in editing and the sisig looks like it has been left out overnight. This is why light is the next chapter. Fix the light and half the color work is already done.
2. Light: the one non-negotiable
If you take nothing else from this guide, take this. Move your table closer to a window and turn off every overhead light in the room. That single change will do more for your photos than a new phone, a new lens, or a new set of props.
Why window light works
Daylight has a broad, even color spectrum, roughly 5000 to 6500 Kelvin depending on the time and weather. Your camera is calibrated for it and knows how to read food under it. A north-facing window on an overcast Manila afternoon is the softest, most flattering light you can find without buying anything. A south-facing window at 10 a.m. gives you strong, directional light that makes sauces glisten. Both are usable. What is not usable is the yellow ceiling bulb and the cool under-cabinet strip firing at the same food at the same time.
Working with the light you have
- Shoot between 9 a.m. and 4 p.m. when possible. Golden-hour light is beautiful for portraits but too orange for brown food.
- Let the light come from the side or from behind the plate, never from directly behind the camera. Backlight makes sauces glossy and green vegetables translucent.
- Use a piece of white foam board, a folded bedsheet, or even a folded napkin on the shadow side to bounce a little light back into the darker part of the frame.
- If your window is too bright, hang a white curtain or a piece of baking paper against it to diffuse it. Harsh midday light casts shadows sharp enough to distract from the food.
What to avoid
Turn the overhead lights off. Turn off the flash on your phone. Do not use one of those clip-on ring lights unless you are shooting video, and even then aim it at the wall to bounce it. Mixed light sources are the fastest way to end up with an uneditable file, because different parts of the frame will need different white-balance corrections and no single slider will fix all of them at once.

A hosting set built for the frame
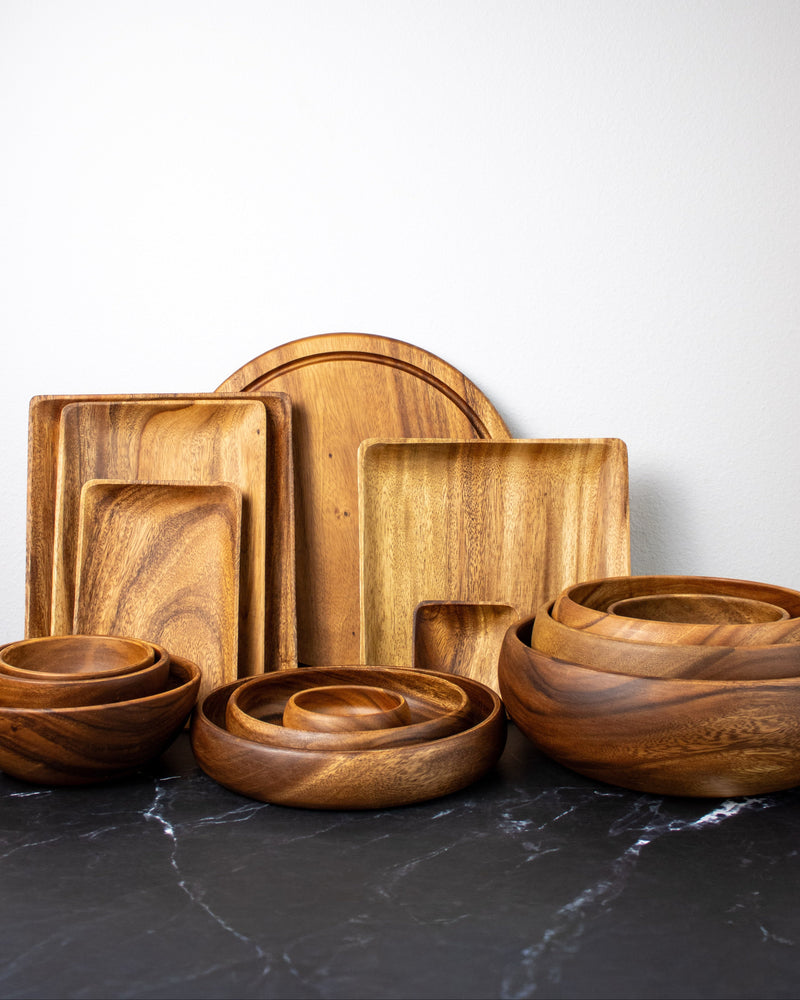
The Family Hosting Set gives you the mix of bowls, plates, and boards a photographable Filipino spread actually needs, in tones that read well under window light.
Shop the Family Hosting Set →
3. Composition: layering the Filipino table
A Filipino table is layered by nature. Rice, ulam, sawsawan, drinks, and something sweet at the end all sit within reach of the same seat. That density is a gift for composition. You just have to arrange it so the camera reads it as generosity, not clutter.
Choose your angle first
There are three angles that work for almost every Filipino food shot.
- Overhead, or flat-lay. Best for spreads, boodle fights, and anything on a long board or a large platter. Shows the full geography of the meal. Weakest for a single tall dish where you lose all sense of height.
- Three-quarter, about 45 degrees. The most flattering angle for a single dish with height, like a bowl of kare-kare or a mound of pancit. Shows both the surface of the food and the vessel it sits in.
- Straight-on, about 10 to 20 degrees off horizontal. Works for tall drinks, layered halo-halo, or a stack of puto. Weakest for anything served flat in a bowl.
Anchor, support, whisper
Every good food frame has three tiers. An anchor, which is the main dish, taking about a third of the frame. Supporting characters, which are the rice, the sawsawan, a serving spoon, a small bowl of patis or suka. And whispers, which are the folded napkin, a sprig of dahon ng sili, a wooden spoon resting on the board, or a hand reaching in with a plate. The whispers are what stop the picture from looking staged. Real meals have hands, crumbs, and half-poured water glasses.
Odd numbers and negative space
Three or five props read as intentional. Two or four often read as symmetrical, and symmetry looks stiff in food photography unless you are shooting a magazine spread. Leave one corner of the frame empty. That negative space gives the eye somewhere to rest, and it is where a title, caption, or logo can sit if you are shooting for a small business. Filipino table-setting traditions actually help here, since the sawsawan bowls are meant to be scattered around the ulam rather than lined up in a row. If you are new to the arrangement, our guide to the most common Filipino table setting mistakes covers the placement logic that also happens to photograph well.
4. Wood as prop: how acacia earns its place
Wood is not a neutral backdrop. It is a warm, textured, patterned surface that changes how everything on top of it reads. A dark walnut board will make white rice glow and adobo disappear. A very pale board will make the same rice look grey. Acacia sits in the middle, with enough variation in the grain to give the eye something to follow and enough color range to keep both light and dark food readable.
What grain does in a photograph
Straight, tight grain runs quietly under the food and lets the dish take the frame. Wilder grain, with knots and swirl, becomes a subject in its own right and needs a simpler dish on top or it will fight. Acacia bowls and boards, because they are cut from a fast-growing hardwood with dramatic figuring, tend toward the wilder end. That is a feature for a family-style shot with lots of dishes, and a distraction for a hero shot of a single bowl of soup. Learn to read the grain before you set the plate down.
Direction matters
- Run the grain toward the camera to add depth and make the frame feel longer.
- Run the grain across the frame to make wide spreads feel wider.
- Rotate the board a few degrees off square. Grain lines perfectly parallel to the frame edge look flat and posed.
Mixing tones without mixing woods
The trick with using wood as prop is layering different tones without stacking woods that fight. One dark board plus one medium-tone bowl plus a pale linen napkin gives the eye three clear steps to travel between. Three near-identical woods look like a lumberyard. If you are still building out your surfaces, the guidance in our piece on displaying wooden tableware at home applies to the frame as much as it does to the shelf.

Bowls that photograph both ways
The Gorosin bowls are deep enough to hold sauce for a top-down shot and shaped for a clean silhouette when you drop to a three-quarter angle.
Shop the Gorosin Bowl Set →5. Styling the dish: making brown food read
Once light and surfaces are handled, the last problem is the food itself. Sauce-heavy Filipino dishes look better on camera than they do on the stove, if you plate them with a photographer's eye.
Build contrast on the plate
Contrast on the plate comes from three things: color, texture, and shine. Color arrives with a garnish. A scattering of spring onion on the adobo. A few slices of red chili on the sisig. A wedge of calamansi on the pancit. Texture arrives from crunch: chicharon crumbled over pinakbet, toasted garlic on lugaw, crushed peanuts on kare-kare. Shine arrives from fat. Brush a little of the sauce back onto the meat right before you press the shutter, and the surface will catch the light instead of soaking it up.
Rice is your white balance
A small bowl of white rice in the frame does two jobs. It signals the meal is Filipino, and it gives your camera a pure white reference point to expose against. If the rice looks yellow in the picture, your white balance is off and everything else in the frame is off with it. Correct the color on the rice and the rest of the food will fix itself.
Adobo, sinigang, kare-kare: three quick fixes
- Adobo. Pull the meat out of the sauce, brush it with sauce right before the shot, then spoon a little sauce back around the meat in the bowl so it pools and reflects. There is more on the visual traditions of the dish in our piece on how adobo has been served across generations.
- Sinigang. Shoot into the bowl, not down onto it. The steam and the translucent broth read as depth when the camera is low and to the side.
- Kare-kare. Arrange the vegetables so they break the surface of the sauce. If the peanut sauce covers everything, the picture becomes one flat orange field with no anchor for the eye.
Kamayan spreads
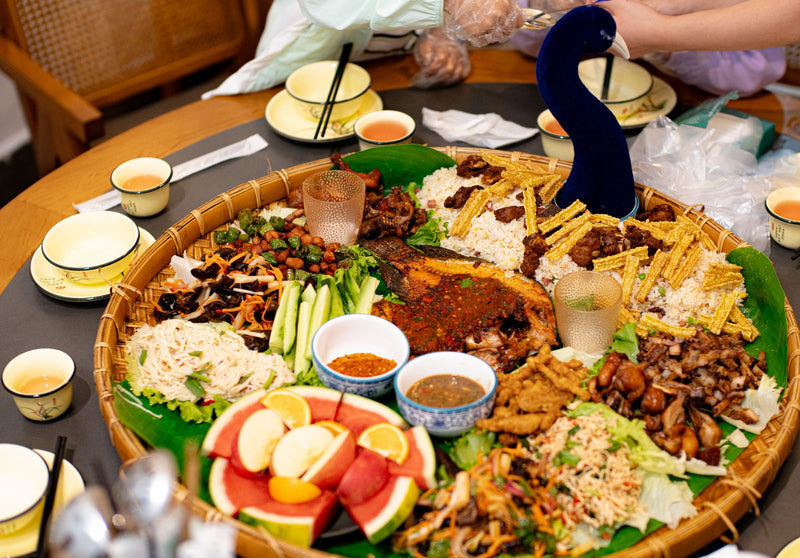
Boodle-fight and kamayan spreads on banana leaves are the most photogenic Filipino format, because the leaf already gives you a green, contrasting background and the food is arranged in rough piles rather than plated in circles. Shoot overhead, keep the banana leaf edges just inside the frame, and let hands into the picture. Two hands reaching in from opposite corners transform a still life into a scene, and it is the moment the photo stops being about the food and starts being about the meal.
6. Editing: warmth without candy
Editing is the last chapter for a reason. Get light and composition right in-camera and editing is a light touch. Get them wrong and no amount of slider work will save the file.
The three-slider fix for warm indoor light
Before you open Lightroom, Snapseed, or your phone's built-in editor, work in this order.
- White balance first. Set the temperature so the rice in the frame looks white, not cream, not blue. Everything else keys off this.
- Exposure second. Lift the shadows a little to open up the dark parts of the sauce. Do not touch highlights unless something is genuinely blown out.
- Contrast third. A small nudge up, no more. Contrast is what separates the meat from the sauce and the sauce from the bowl.
Color, carefully
Filipino food photos go wrong when the orange gets pushed. Adobo, kare-kare, and lechon sauce already sit in the orange-brown band. Push saturation and the picture reads as fake, like the food has been coated in a filter. Pull the orange saturation down a touch instead, and the natural color of the meat comes forward. If the greens on the herbs look grey, lift the green luminance rather than the green saturation.
What to leave alone
Do not add grain unless you are aiming for a film look and you know what you are doing. Do not use presets built for European or American food photography, since they are calibrated for pastel palettes that do not exist on a Filipino table. And leave the whites of rice, coconut milk, and buko juice actually white. Cream-tinted rice is the number-one giveaway of an over-edited food photo.

Plates that stay out of the way
The Ina plates give brown food a neutral, warm-toned stage: wide rim, quiet grain, and enough depth to hold sauce without a rim shot.
Shop the Ina Plate Set →Frequently Asked Questions
Do I need a real camera, or is a phone enough?
A modern phone is more than enough for family and small-business food photos. The upgrade path that matters is light and composition, not sensor size. A phone shot near a window at 11 a.m. will beat a full-frame camera shot under a yellow ceiling bulb, every single time.
What is the best time of day to photograph Filipino food?
Mid-morning to mid-afternoon, roughly 9 a.m. to 4 p.m., when daylight is broad-spectrum and neutral in color. Avoid golden hour for food, since the very warm light pushes brown dishes further into orange. If you must shoot at night, pick one clean window of light and control it, rather than mixing lamps.
How do I stop my photos from looking too yellow?
Turn off every artificial light in the room, shoot near a window, and include a small bowl of white rice in the frame as a white-balance reference. In editing, drag the temperature slider left until the rice reads truly white, and the rest of the color will fall into place.
Should I edit on my phone or on a computer?
Either works. Phone editors like Snapseed and Lightroom Mobile have all the sliders you need for the workflow in chapter six. A computer gives you more precision for color work but is not required for the results most home cooks want.
Can I photograph food on a dark wooden table without it looking muddy?
Yes, if you build contrast around the dish. Add a pale-toned board, a linen napkin in cream or off-white, and a bowl of rice near the plate. The dark table becomes a moody backdrop instead of a muddy midtone, because the eye now has bright anchors to travel between.