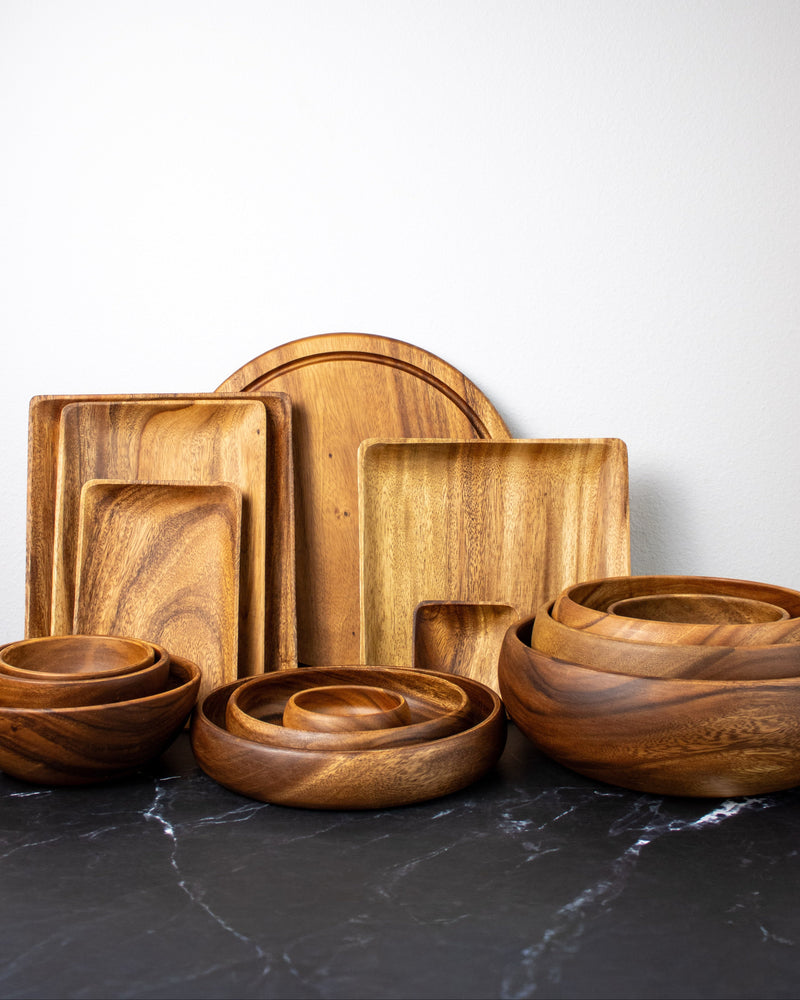
The bowl was probably a wedding gift. Maybe it sat on your lola's aparador for thirty years, brought out for noche buena, then quietly retired to a top shelf when the finish went dull. Now it is yours, and you are wondering whether there is anything under all that grey worth bringing back.
Acacia is a slow-tempered hardwood. Handled well, it can outlive the person who received it new. The pieces that come to us with restoration questions have almost always survived their worst decade already. What they need now is patience and a small set of correct steps, not a rescue.
This is that set of steps. We walk through how to decide if a piece is worth restoring, how to read the damage before you touch anything, and how to clean, sand, and re-oil an old acacia bowl or plate without stripping away the character that makes it worth keeping. If you have inherited a wooden bowl that has gone silver-grey, sticky, dry, or splotchy, and you are hoping it can eat with the family again, start here.
Before You Restore: Deciding If the Piece Can Come Back
The first honest step in any restoration is checking whether you are dealing with a piece that has aged, or a piece that has failed. Acacia is dense and holds up well to decades of use, but it does have a lifespan. Pretending an unsalvageable bowl can come back only leads to hours of sanding and oiling that end with the same crack in the same place.
Before you unpack the mineral oil, spend ten minutes with the piece in daylight. Turn it over, run your finger along the grain, tap the base with a knuckle, hold it up to a lamp. Old wood tells you what it needs if you let it.
Signs a Piece Is Still Worth Saving
- Dull, grey, or blotchy finish with the wood underneath still intact. This is the most common case: surface oils have oxidized off, color has faded, structure is sound.
- Light knife marks and shallow scratches that catch the fingernail but do not reach through. Normal wear for a serving piece.
- Dryness without cracks. If the wood feels rough or the color looks bleached but there are no visible splits, the piece is thirsty, not broken.
- Sticky or tacky patches from someone who oiled with olive oil or coconut oil years ago. Unpleasant, but reversible.
- Faded engraving that has not cracked out. A restoration will usually bring the letter forms back to legibility.
Signs a Piece Should Be Retired
- Through-cracks. If you can see light through a split, or if the crack runs from rim to base, the wall is compromised. Wet food will find that crack, and mold will follow.
- Structural warp that keeps the bowl from sitting flat, or twists a plate into a shallow curl. Some mild warp is livable; a bowl that rocks on the table is done.
- Persistent mold that reappears within days of a proper clean. Deep hyphae have penetrated the grain and no surface treatment will reach them.
- Charred or scorched areas from an owner who put the piece in the oven, microwave, or on the stovetop. The wood cells there are already broken.
- Splintering along the grain, especially at the rim. Loose fibers you can pull off with a fingernail mean the wood is disintegrating from the outside in.
The Middle Ground: Serving-Only Pieces
Some pieces sit between salvageable and retired. A bowl with one stable hairline crack, or a plate with mild warp, can still serve dry food beautifully. Bread, fruit, pasalubong from Baguio, kakanin unwrapped from banana leaf, chocolate. The piece keeps its place on the table without carrying wet food it can no longer hold safely. Restoring these is worth doing, but be clear-eyed about what the piece will hold afterward.
Reading the Damage: What Faded Acacia Is Actually Telling You
Every symptom on an old bowl has a cause. Once you know which cause you are looking at, the restoration route almost picks itself. This chapter is a translation guide. Move through your piece and match each thing you see with what is happening underneath.
The Grey Cast
Grey, silvery, chalk-dull color across the surface is the single most common complaint on a vintage acacia piece. It looks final, but it almost never is. What is happening: the surface oils that once kept the wood dark and lustrous have oxidized, evaporated, or been washed away over years of hand-washing and sunlight. The lignin in the top cell layer has broken down under UV, leaving a thin bleached film. What it means for restoration: this is cosmetic. Oiling alone often brings back seventy to eighty percent of the original color. If any deeper sanding is needed, it is only to remove the softest oxidized layer.
The Sticky Feel
Run your finger across the wood. If it drags, if it feels like there is a thin film that will not come off with a rinse, the previous owner oiled with the wrong thing. Olive oil, canola, corn, and unrefined coconut oil are all drying oils. They oxidize and polymerize into a gummy surface layer that traps dust and eventually turns rancid. What it means: the film has to come off, all the way down to raw wood, before you can begin re-oiling. This is the reason our cleaning chapter is more thorough than most.
Deep Stains and Dark Spots
Turmeric from a kare-kare left too long. Soy sauce puddles from lechon dipping. Patis fingerprints. Red wine, kalamansi acid rings, coffee. These pigments soak into the open grain when the finish is thin, and most will not lift out. What it means: you can lighten them with a light sanding, but many will remain as part of the piece's biography. In our workshop we treat these as features, not failures. A bowl that has actually been used and eaten out of should look like it.
Warp and Uneven Rims
Set the bowl on a flat surface. Push down on the rim, quarter to quarter. If it rocks noticeably, the wood has moved. Uneven moisture cycles (a bowl washed hot, dried on one side, stored damp) push acacia into gentle asymmetry over decades. What it means: mild warp, under about three millimeters of gap under the rim, is livable and often disappears after re-oiling because the wood rehydrates evenly. Severe warp, or a base that has curled, is retirement territory.
Rough or Raised Grain
Slide your palm across the inside of the bowl. If it feels like fine sandpaper, or like the fibers are lifting, the surface has raised from repeated wetting. This is normal and almost always fixable with the right sanding pass. Splintering, on the other hand, where fibers are actively separating from the wood, is not the same thing. Raised grain is smooth stiffness. Splintering catches skin.

The bowl that ages the way this article is written for
Our Gorosin bowl set is turned from single blocks of Philippine acacia so the pieces reward decades of the exact care described here.
Shop the Gorosin Bowl Set →The Clean Start: Deep Cleaning Without Damaging the Wood
Every restoration begins with getting the piece back to bare, clean wood. That does not mean scrubbing it to death. Acacia does not like long baths, hot water, or aggressive chemicals. The goal is to lift the old oil residue, food staining, and airborne grime without opening up the grain any further than it already is.
What You Will Need
- Warm (not hot) water
- Mild, unscented dish soap. Skip citrus-degreaser formulas, they are too aggressive
- Two soft, lint-free cotton cloths
- A soft-bristle brush (an old toothbrush works well for carved or engraved detail)
- A clean kitchen towel and a drying rack or upside-down bowl to prop against
- White distilled vinegar, only if you find mold
The Wash, Step by Step
- Rinse the piece under warm running water for no more than 60 seconds to loosen surface dust.
- Put a small drop of dish soap on the damp cloth. Wipe with the grain, never against it, using long even strokes.
- For any sticky old-oil residue, work in short passes. Wipe, rinse the cloth, re-soap, wipe again. Let the piece rest a minute between passes so the soap can lift the film.
- Use the soft brush for engraved letters, carved rims, or crevices where dust has collected.
- Rinse quickly under running water to remove soap traces, again no more than 60 seconds.
- Pat dry immediately with the clean kitchen towel. Do not leave the piece to sit wet on the counter.
- Stand it upright, on its edge if possible, in a shaded and ventilated spot, and let it air-dry for a full 24 hours before you touch it again.
That 24-hour rest is the step most people skip. Wood swells when it drinks water, and you cannot judge damage, sand, or oil it accurately until it has returned to its resting size. If you can wait 48 hours, even better.
Handling Mold
If you find grey-black or green fuzzy patches during the wash, stop and switch tools. Mix white distilled vinegar with warm water at roughly one to one. Wipe the affected area with a cloth dampened in the mixture, then rinse quickly and dry as normal. Vinegar is mildly acidic and disrupts most surface mold safely on food-contact wood. Now dry the piece and watch it for a week. If the mold reappears, the fungus has reached below the surface and no home restoration can pull it back. That piece is a retirement candidate. Our wooden bowl mold guide covers the deeper cases if you want a full read on identification.
Careful Sanding: Bringing Back the Grain Without Losing the Piece
Sanding is where most home restorations either succeed or wreck the piece. A vintage acacia bowl has already given up a millimeter or two of its original wall to age and use. There is not much to spare. The rule is: sand as little as you can get away with, and always with the grain.
Do You Actually Need to Sand?
If the finish is only dull and the wood is smooth to the touch, you probably do not need to sand at all. Oiling alone will handle it. Reach for the sandpaper only if:
- The surface is genuinely rough or raised after the 24-hour dry
- There is a sticky or lacquered previous finish that would not come off with washing
- Shallow scratches or scorch marks need to be leveled
- You want to soften a stained area (knowing you will not fully remove it)
The Grit Progression
You want to move from coarse to fine, spending as little time as possible at each grit. Never start with anything coarser than 120 unless you are removing severe damage, and even then, be conservative.
- 120 grit. Only if the surface is genuinely rough or you are lifting an old finish. Two or three light passes with the grain, no pressure beyond the weight of your hand.
- 180 grit. The main working pass. This is where most of the restoration sanding happens.
- 220 grit. Smoothing pass, evening out anything the 180 left behind.
- 320 grit. Final finish. This is the grit that gives food-contact wood the soft, closed surface you want before oiling.
Below 320 you start closing the grain enough that oil will not penetrate. Above 100 grit you start to lose wood you cannot get back. Stay in the 120 to 320 window and you will be fine.
Between-Grit Habits
- Wipe the piece with a dry microfiber cloth between grits. Dust from a lower grit will scratch through a higher one.
- Feel the surface with the flat of your hand before moving up. If it does not feel ready, do another pass at the same grit.
- Raise the grain deliberately. After the 180 pass, wipe the surface with a barely-damp cloth. Let it dry fully. The fibers that lift will get knocked down by the 220 pass, giving you a smoother final surface.
- Vacuum or wipe your workspace between grits so grit particles do not travel.
Where Not to Sand
Do not sand into engraved letters or carved rims unless you are prepared to lose their crispness. Do not sand across the base ring on a bowl that has a footed profile, the shape is doing structural work. Do not sand the underside of a plate as aggressively as the top, it will thin unevenly. And do not sand a cracked area to try to erase the crack. You will only weaken the wall further.

For pieces built to be passed down
The Manila bowl set is finished to the same 320-grit closed grain we recommend for restoration, so it comes ready for the same long life you are working toward here.
Shop the Manila Bowl Set →Re-oiling and Sealing: Feeding the Wood Back to Life
This is the step that turns a clean, dry, sanded piece back into a bowl worth eating from. Wood is thirsty after decades of losing surface oil to washing and air. It will drink several coats before it stops. The mistake most people make is one thin pass and calling it done. A properly restored piece drinks until it is full.
Choosing the Right Oil
We recommend food-safe mineral oil. It is a saturated hydrocarbon, does not go rancid, does not oxidize, does not polymerize into stickiness, and the U.S. Food and Drug Administration recognizes pharmaceutical- and food-grade mineral oil as safe for direct food contact. It is the same oil most professional cutting-board makers use, and it is what we finish our own pieces with.
Do not use olive oil, canola, corn, sunflower, sesame, or unrefined coconut oil. All of these are drying or semi-drying oils. They start off feeling correct on the wood, then oxidize into a tacky film within a few weeks. This is the exact residue you cleaned off in the deep-wash step. Fractionated coconut oil (MCT oil) is a plant-based alternative that does not go rancid, but it is harder to find in the Philippines and mineral oil remains the more reliable choice. Our guide to seasoning a new acacia bowl walks through the same oiling logic in detail if you want to compare notes.
The First Oiling
- Set the bottle of mineral oil in a bowl of hot tap water for five minutes to warm it. Warm oil penetrates deeper than cold oil. Do not microwave it.
- Fold a clean lint-free cotton cloth into a pad and pour a generous amount of oil onto it.
- Massage the oil into the wood in slow circles, then finish with long strokes along the grain. Do not skimp. A restored piece drinks more than a new one.
- Let the piece sit for 30 minutes. You will watch dry spots appear where the wood pulled the oil in. Those are the areas that need another pass.
- Wipe off any excess with a clean cloth. Never leave standing oil on the surface, it will oxidize slowly and dull the finish.
- Wait an hour. Repeat the oiling pass. On a badly faded piece you will need three to six passes over 24 to 48 hours before the wood stops drinking.
- You know you are done when the oil sits on the surface for a full ten minutes without any change in absorption.
Sealing With Beeswax
Once the wood has stopped drinking oil, the surface is fed but still permeable. A final beeswax layer adds water resistance for daily use and gives the piece a soft, warm glow instead of a flat matte finish. You can buy a ready-mixed board-cream, or make your own by melting food-grade beeswax into mineral oil at roughly one part wax to four parts oil.
- Warm the mixture gently until it is soft but not liquid.
- Apply a thin layer with a soft cloth, working with the grain.
- Let it sit for 20 minutes. It will look cloudy at first.
- Buff with a clean, soft cotton cloth in slow circles until the surface comes up warm and even.
One thin sealing pass is enough. A heavy layer will just wipe off with the first hand-wash and leave you back where you started.
Living With a Restored Piece: Care So It Lasts Another Generation
The restoration is the reset. What determines whether the piece lasts another five years or another forty is the daily and monthly rhythm afterward. Restored acacia is not fragile, but it is different from new acacia. The wood has less mass to spare, the grain has been opened and closed several times, and the oil layer is fresh. Treat the first month gently and the piece rewards it.
The First 30 Days
- Week 1 and 2: Use for dry foods only. Bread, fruit, pasalubong-style spreads, chocolate, cheese. Let the finish continue to cure and settle.
- Week 3: Introduce moderately wet foods. Rice, cooked vegetables, ulam that is drained rather than saucy.
- Week 4: Return to normal use, including sinigang, adobo, kare-kare, provided you serve at room-to-warm temperature and do not leave food sitting for hours.
- Oiling checkpoints: Re-oil at day 14 and day 30. New restorations drink faster than mature pieces.
The Monthly Rhythm
- Hand-wash after every use with warm water and mild soap. Never soak, never dishwasher.
- Dry immediately with a towel, then stand upright to finish drying for at least a few hours.
- Oil every four to six weeks, or whenever the wood starts to look thirsty (dull, matte, faintly lighter in color).
- Store away from direct sun, radiators, and the stovetop. Any heat source dries the wood unevenly.
- Do not stack heavy pieces on top of a freshly restored bowl for the first month. The finish is still setting.
Our full routine is in the how to care for acacia wood bowls guide if you want a printable version to keep near the sink.
When to Repeat the Restoration
A full restoration of a daily-use piece is a two to three year rhythm. Between full restorations, spot-restore as needed: light sanding on a fresh scratch, an extra oil pass on a dry area, a beeswax buff before a gathering. If you keep the piece in serving-only rotation, a full restoration every five years is usually enough.
Marking the Piece
Many families who go through a restoration ask us about adding a name, a date, or a family monogram to the newly-finished piece. It is a natural moment. The bowl has been rebuilt for a second life, and marking that second life is how heirloom pieces earn their name across generations. Our guide on engraving a family tree piece is a good starting point if that is where you want to take the restoration.

Mark the restoration with a name and a date
Our custom engraving service adds a family name, a wedding date, or a short dedication to any restored or new piece, in the same workshop that finishes our bowls.
Shop Custom Engraving →Frequently Asked Questions
Can you restore an acacia bowl with cracks?
It depends on the crack. Fine surface checks that do not go through the wall are cosmetic and will often close with re-oiling. Cracks you can see light through, or that run from rim to base, mean the wall is compromised and the piece should be moved to serving-only use for dry food, or retired. Never try to fill a through-crack with food-contact glue or wax for a piece meant to hold wet food.
What oil is safe for restoring wooden bowls?
Food-safe mineral oil, recognized by the U.S. Food and Drug Administration for direct food contact, is the standard for a reason. It does not go rancid, does not oxidize, and penetrates deeply. Avoid olive, canola, coconut, corn, and other kitchen cooking oils, all of which turn tacky over time. A mineral oil and beeswax cream is a good final sealer.
How long does the full restoration process take?
Plan for three to five days of elapsed time, though your hands-on work is only about three to four hours across that window. The wait times matter: 24 hours to air-dry after washing, 30-minute rests between oil coats, and often another 24 hours between the final oil pass and the beeswax seal. Rushing any of these steps shortens the life of the restoration.
Can I use olive oil on my acacia bowl?
No. Olive oil is a drying oil that oxidizes into a sticky, eventually rancid film on the surface of wood. It will feel right for the first two weeks and start turning tacky by week four. If your inherited piece feels sticky today, olive or another kitchen oil is almost certainly why. Use food-safe mineral oil instead.
Is it safe to sand a wooden bowl at home?
Yes, if you stay within the 120 to 320 grit range, sand only along the grain, and stop as soon as the surface feels ready. Home sanding goes wrong when people start too coarse (60 or 80 grit), use power sanders on hand-turned bowls, or try to erase deep stains by sanding away wood. Restraint is the whole skill.
How can I tell if my acacia bowl is beyond restoration?
Look for through-cracks, structural warp that makes the bowl rock on a flat surface, mold that reappears within a week of cleaning, charred or scorched patches, or active splintering along the grain. Any one of these means the piece should either move to dry-serving-only use or be retired with respect. A retired heirloom piece can still hold dried flowers, keys, or wrapped chocolates for many more years.